Product Description
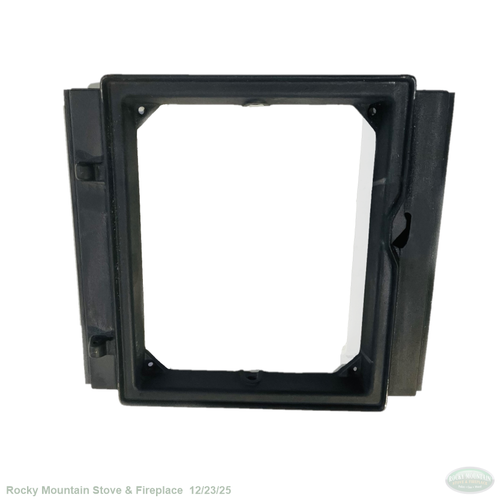
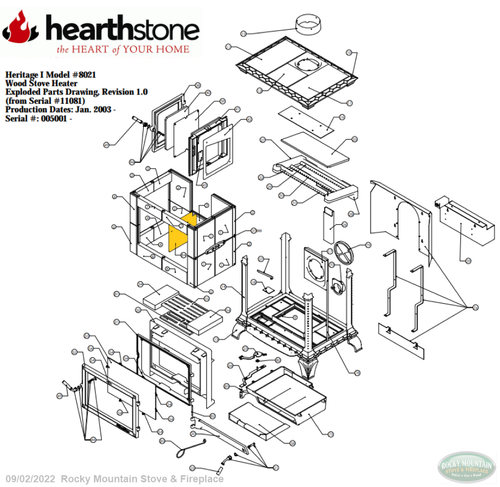
Hearthstone Heritage 8021 Side Outer Door Frame
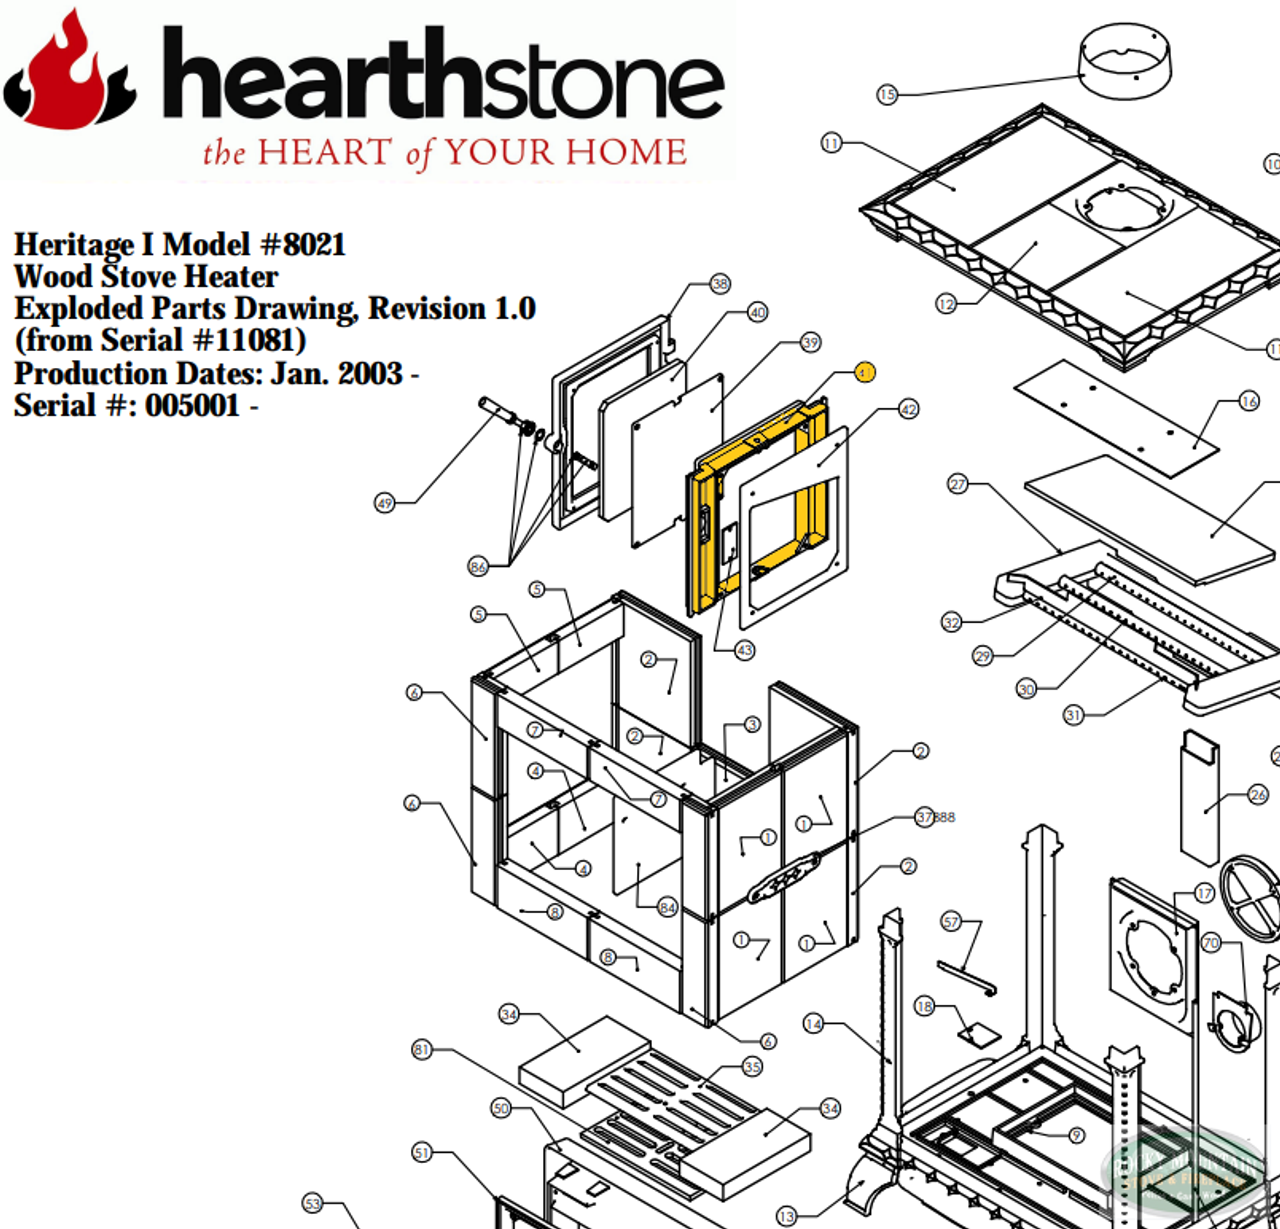
#2010-255 This Part is #41 in the Picture
For use on the below model only:
- Hearthstone Heritage 8021 Wood Stove Built from 2003-2013
This frame is not the loading door that opens, this is the cast iron frame on the outer part of the stove that the load door hangs on and latches on to.
PROCEDURE:
1. Open the side door. Lift it straight up and off the side door frame, taking care not to lose the hinge pins and washers that will be reused. If the new door does not have the stone tile, cast plate, and latch assembly installed; remove them from the original door and installed on the new door.
2. Locate the bolts in the top and bottom of the side door frame. These bolts hold the frame to the top and bottom castings. Remove these bolts with the 9/16” wrench.
3. Locate the threaded rod under the right side of the bottom casting. This rod threads into the top casting, runs through the center of the right side stones, and is held with two nuts under the bottom casting. Using a 9/16” wrench, turn the threaded rod out of the top casting. Turning the sandwiched nuts counterclockwise will un-thread the rod from the top casting.
4. With the bolts and threaded rod removed from the top casting, the top casting is now loose. If it is not, tap carefully upward around the underside with a rubber mallet until it loosens. Ensure the bungee cord is in place around the stove’s body, then, with assistance, pull the top off the stove and set it aside until it is time to reinstall it.
5. With the top off, you can pry out the two stones that are on top of the side door frame. Soapstone is soft, and will chip easily if too much pressure is applied. Place a large flat screwdriver blade under the stones from inside the stove and carefully pry them up from the frame until they break free - remove the stones. Using a small hammer and flat tipped screwdriver or chisel, carefully chip off any stove cement on the stones and metal splines to prepare them for reassembly. Clean any residual cement and other debris from all parts intended for reuse.
6. Remove the four screws (1/4” – 20 x ½” black oxide) that hold the outer door frame to the inner door frame with a phillips screwdriver. To remove the outer door frame, pull it straight up (it has flanges on the sides that fit into the slots in the stones around it) and out of the stove. If stove cement prevents movement, pry the frame up carefully with the screwdriver from inside the stove.
7. Lightly misting the stones with water can improve cement adhesion. After cleaning the stones, splines, and door frame of old cement and debris, apply a bead of fresh stove cement on the bottom and two sides where the new frame will set into the stove. Slide the new doorframe in place; ensure the side flanges fit into the stone slots. Join the outer frame to the inner frame with the four screws removed in step six. Smooth out any excess cement on the inside of the stove on the sides and bottom.
8. Apply a bead of cement to the top of the door frame and to the splines that are placed on the left and right sides above the door frame. Push the two stones back into their position above the side doorframe. Again, smooth any excess cement extruded around the inside of the stones.
9. Prep the new side door: (if needed)
1) Insert the ¼” rope gasket into the smaller channel on the inside of the door frame. Pull the paper backing off the gasket a few inches at a time and pack the gasket into the channel. Trim off any excess gasket.
2) Position the ¼” thick door tile stone on top of the ¼”gasket with the finished side facing out.
3) Place the impact plate on top of the stone and secure it with the four screws removed with the plate from the original door.
4) Apply a thin bead of the gasket glue to the larger gasket channel in the door. Pull the paper backing off the ½” rope and pack it into the prepared channel. Do not stretch or bunch the gasket. Do not saturate the
gasket with the liquid glue as this causes the gasket to harden and provide a poor seal. Trim any excess gasket.
5) Remove the latch assembly from the original door by turning out the setscrew(s) with a 5/32” allen wrench. Latch assembly design may vary – so ensure you note the configuration, and location of all assembly components. Place the latch assembly on the new door – ensure all parts are reinstalled properly on the new door.
10. Place the assembled door onto the frame; ensure any shim washers are in place between the door and frame tabs. Check for a good fit, and seal.
11. Before placing the top casting back onto the stove, inspect the gasket on the underside of the top. If the gasket is still intact, soft and pliable, it can be reused. If the gasket is hard and compressed, deteriorated, or has missing or damaged sections, pull it out, scrape any other debris out of the channel in the top casting, and glue down a fresh section of 3/8” medium density rope gasket.
12. Place a thin bead of cement around the top inside edge of the soapstone walls. This will ensure that the top is sealed to the sides of the firebox.
13. Place the top back onto the stove body and maneuver it so that it drops in place onto the soapstone walls. If necessary, carefully tap it down into position with a clean rubber mallet. Re-thread the rod in the right side into the top casting and also the bolt that goes up through the top of the side door frame. Replace the bolt in the bottom of the door frame and tighten all with the 9/16” wrenches. Do not over tighten.
14. Before you resume burning normal fires, we recommend one low temperature, “break-in” type fire to season the new parts and cement, as described in the owner’s manual.

Product Videos
Custom Field
Product Reviews
1 Review Hide Reviews Show Reviews
-
door frame
However, I purchased a HearthStone 90-73213, Side Door Latch 90-73213 in Nov 2018 that is very difficult to close because it is so thick in the metal tab that is turned to latch the door to the frame. It is three times thicker that the front door latch. Any suggestions?


