Product Description
No Longer Available.
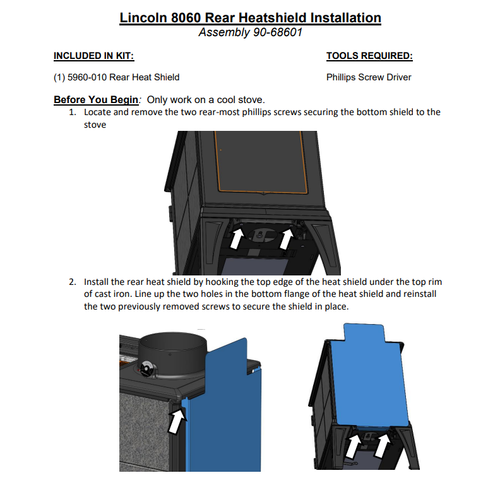
- If you are installing the stove in a top exit configuration, you will need to first attach the upper extension plate to the shield using the 4 screws (8-32 x 3/8”) provided with this kit. Align the holes in the extension plate with the holes on the shield with the extension plate extending upward; where it will go behind the stovepipe (see illustration on the back of this page). Do not install the extension plate if the stove has a rear flue exit configuration.
- To install the heat shield brackets, first locate the four factory installed bolts on the back of the stove. Remove the two bolts closest to the flue collar using a 7/16” wrench. Place the brackets on the back of the stove so that they line up with the threaded holes on the back of the stove and with the hooked portion of the brackets on top, extending upwards (see illustration on the back of this page for proper bracket placement). Replace the bolts to secure the brackets.
- Align the four holes on the shield with the 4 threaded holes in the brackets and install the 4 screws (10- 24 x 3/8”) to hold the shield in place.


