Product Description
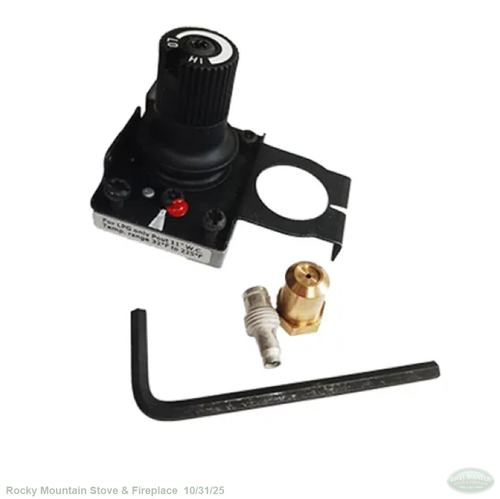
Hearthstone 93-56010 Conversion Kit LP to NG
- Champlain 8301 SN# up to 21226
- Santa Fe 8761 SN# up to 22523
KIT COMPONENTS:
- 7211-312 - NG Valve Regulator
- 7200-332- #32 Burner Orifice
- 7211-163 – 62mm Pilot Orifice
- NG Sticker
PROCEDURE:
1) Open the front of the stove. For the Santa Fe use the 1/8” hex wrench provided with the stove to remove the screw that holds the front door closed. For the Champlain, remove the two phillips screws on the top of the front panel that are used to hold the face of the stove in place during transportation. Once the screws are out, drop the ash lip down and locate the lever to release the easy off front. Carefully hold the front at the top, pull the lever up to release it. Now you can remove the front panel and place it in a safe place until it is required for reassembly.
2) Remove the stainless steel pan burner from the firebox. To remove the burner in the Santa Fe or Champlain, Simply lift it up and out of the firebox.
3) Locate the main burner orifice that is located inside the air shutter box in the rear center of the firebox (see photo on page 4). Insert a 1/2" deep socket with a 3" extension into the round opening in the front of the air shutter box to remove the LP gas orifice. Install the #32 NG orifice provided with this kit and snug with the socket and extension. NOTE: Stoves installed above 2,000 feet (610m) in Canada may require a derated orifice (see specifications page 4).
4) Locate the pilot assembly inside the stove that has also been exposed by removal of the pan burner system (see photo page 4). Remove the easy off top of the pilot burner hood by grasping it and pulling it up and off the pilot assembly.
5) Using a 5/32" hex wrench, unscrew and remove the LP pilot orifice. Insert the 62mm
LP orifice provided with this kit and tighten it with the hex wrench.
6) Snap the pilot burner hood back into place on the pilot stem, making sure the cutout of the hood aligns with tang on the orifice housing.
7) Adjust the air shutter by turning the bolt on the outside back of the stove. Turn the bolt out, away from the stove one to three full revolutions to close the air shutter. After the conversion is completed, adjustments in the flame can be made from outside the stove. Important: Make certain that orange flames are not present as this is a sign of incomplete combustion and will produce soot.
8) Insert the burner system back into the firebox. Refer to the owner’s manual for the proper placement of the logs and embers. Replace and secure the front door (Santa Fe) or Glass front (Champlain). It will not be necessary to replace the top bolts on the face of the Champlain that were removed in step one.
VALVE CONVERSION: See illustrations below.
9) Using a Torx T20, or slotted screwdriver, remove and discard the three pressure regulator mounting screws (A), pressure regulator tower (B) and diaphragm (C).
10) Insure that the rubber gasket (D) is properly positioned and install the new HI/LO pressure regulator assembly to the valve using the new screws (E) supplied with the kit. Tighten screws securely.
11) Install the enclosed identification label (F) to the valve body where it can be easily seen. Place the White NG sticker over the Red LP sticker on the valve door.
12) Turn on the gas supply. For checking and properly adjusting the manifold pressure, refer to the appliance owner’s manual for instructions. LEAK TEST ALL FITTINGS BEFORE AND AFTER LIGHTING THE STOVE WITH A GAS SNIFFER.
The input rate of the heater can be verified by checking the manifold pressure. If the manifold pressure is correct, then the input rate is correct.
13) Record this change by filling out the fuel conversion label on the back of the stove.


